

Modern AR-15s are highly modular rifles, and one of the main reasons they’ve earned this reputation is the adaptability of their rail systems. Whether you’re running Picatinny, M-LOK, or KeyMod, your rail allows you to attach accessories exactly where you need them for your shooting style, mission set, or competition needs.
These rail “positions” are often referred to like the face of a clock—12 o’clock, 3 o’clock, 6 o’clock, 9 o’clock, and 45-degree angles in between. Each position offers unique advantages for mounting lights, optics, grips, and other tools. Understanding these positions—and how to use them effectively—can make the difference between an average rifle setup and one that performs flawlessly under stress.
Understanding The Most Common Rail Positions
When we refer to rail positions, we’re essentially describing where on the circumference of your handguard an accessory is mounted:
• 12 o’clock – Top center of the rail, aligned with your optic.
• 3 o’clock – Right-hand side (for right-handed shooters, this faces outward).
• 6 o’clock – Bottom center of the rail.
• 9 o’clock – Left-hand side.
• 45-degree – Angled positions between the major points.
This terminology applies regardless of whether you’re running a quad rail or a slimmer M-LOK/KeyMod setup with accessory slots.
12 O’Clock Position – Top Rail
The 12 o’clock position is prime real estate on your AR. It runs along the top of your handguard and usually mates seamlessly with the upper receiver rail.
Common Uses:
• Primary optics (red dots, LPVOs, prisms)
• Back-up iron sights (BUIS)
• Inline weapon lights or lasers for ambidextrous activation
• Night vision or IR laser/illuminator setups for duty builds
Why It’s Important:
This is the most stable, consistent position for aligning sights and aiming devices. Having a clear, uninterrupted 12 o’clock rail ensures maximum flexibility for sight placement and co-witnessing options.
RailScales Recommendations:
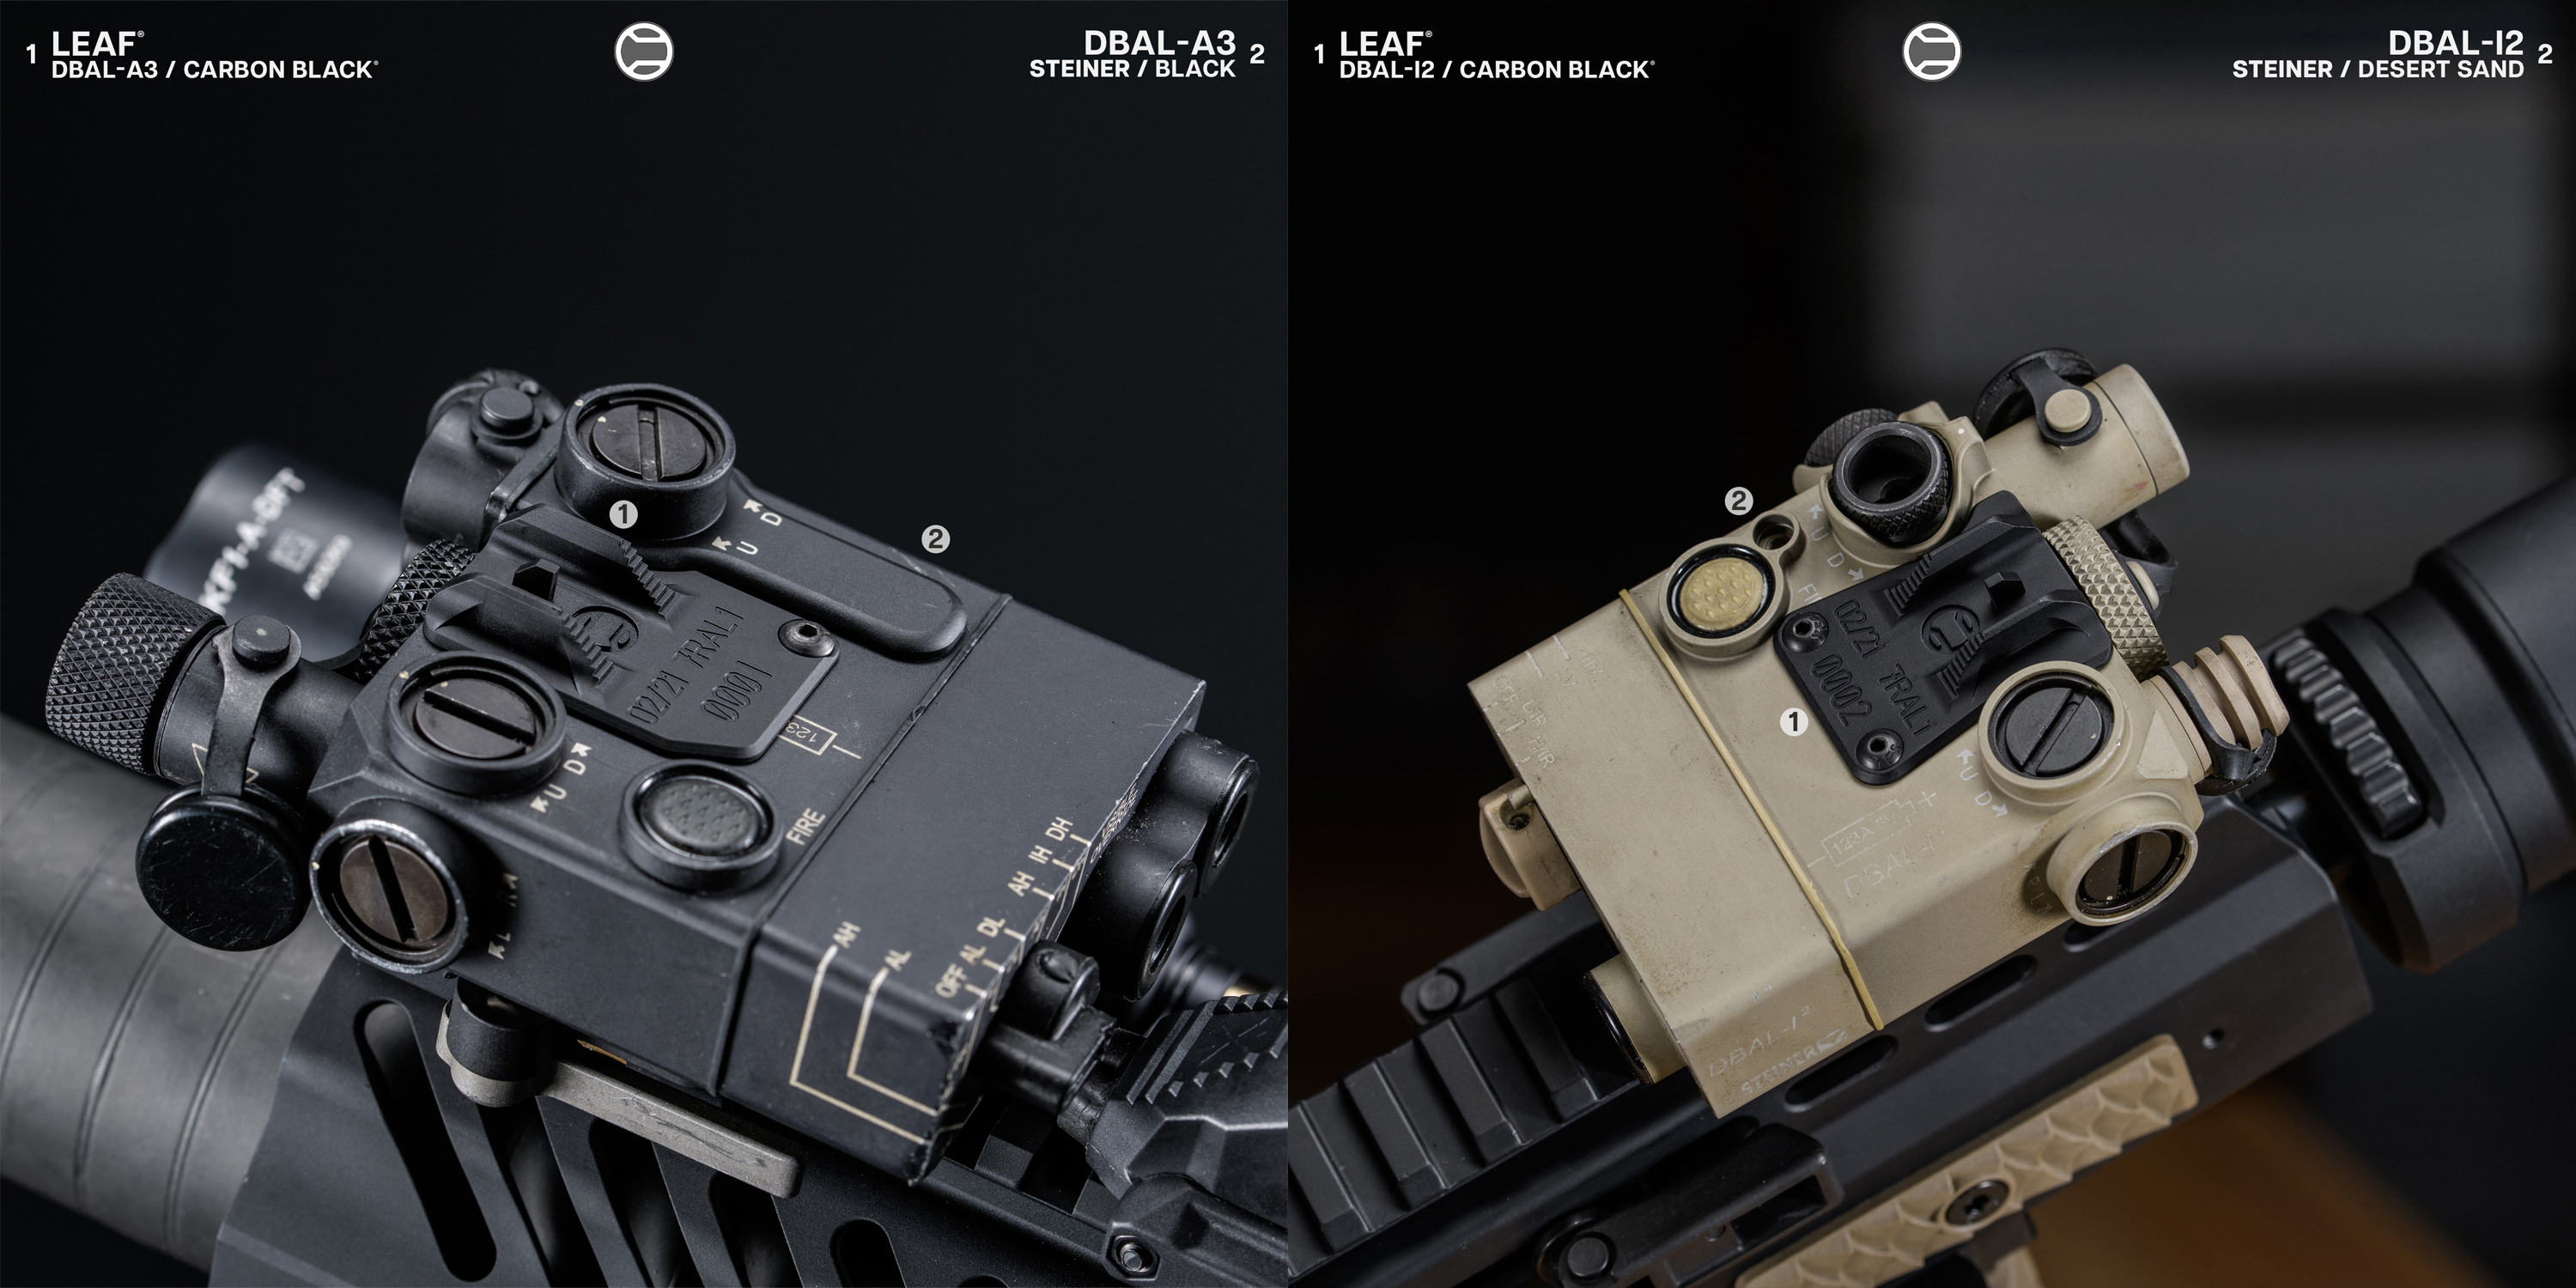
• LEAF® - Fixed Iron Sight for DBAL Lasers. Hard mount to your laser and clean up valuable rail space by eliminating your folding front sight. Just mount to your laser, and adjust your rear windage to your Red dot.
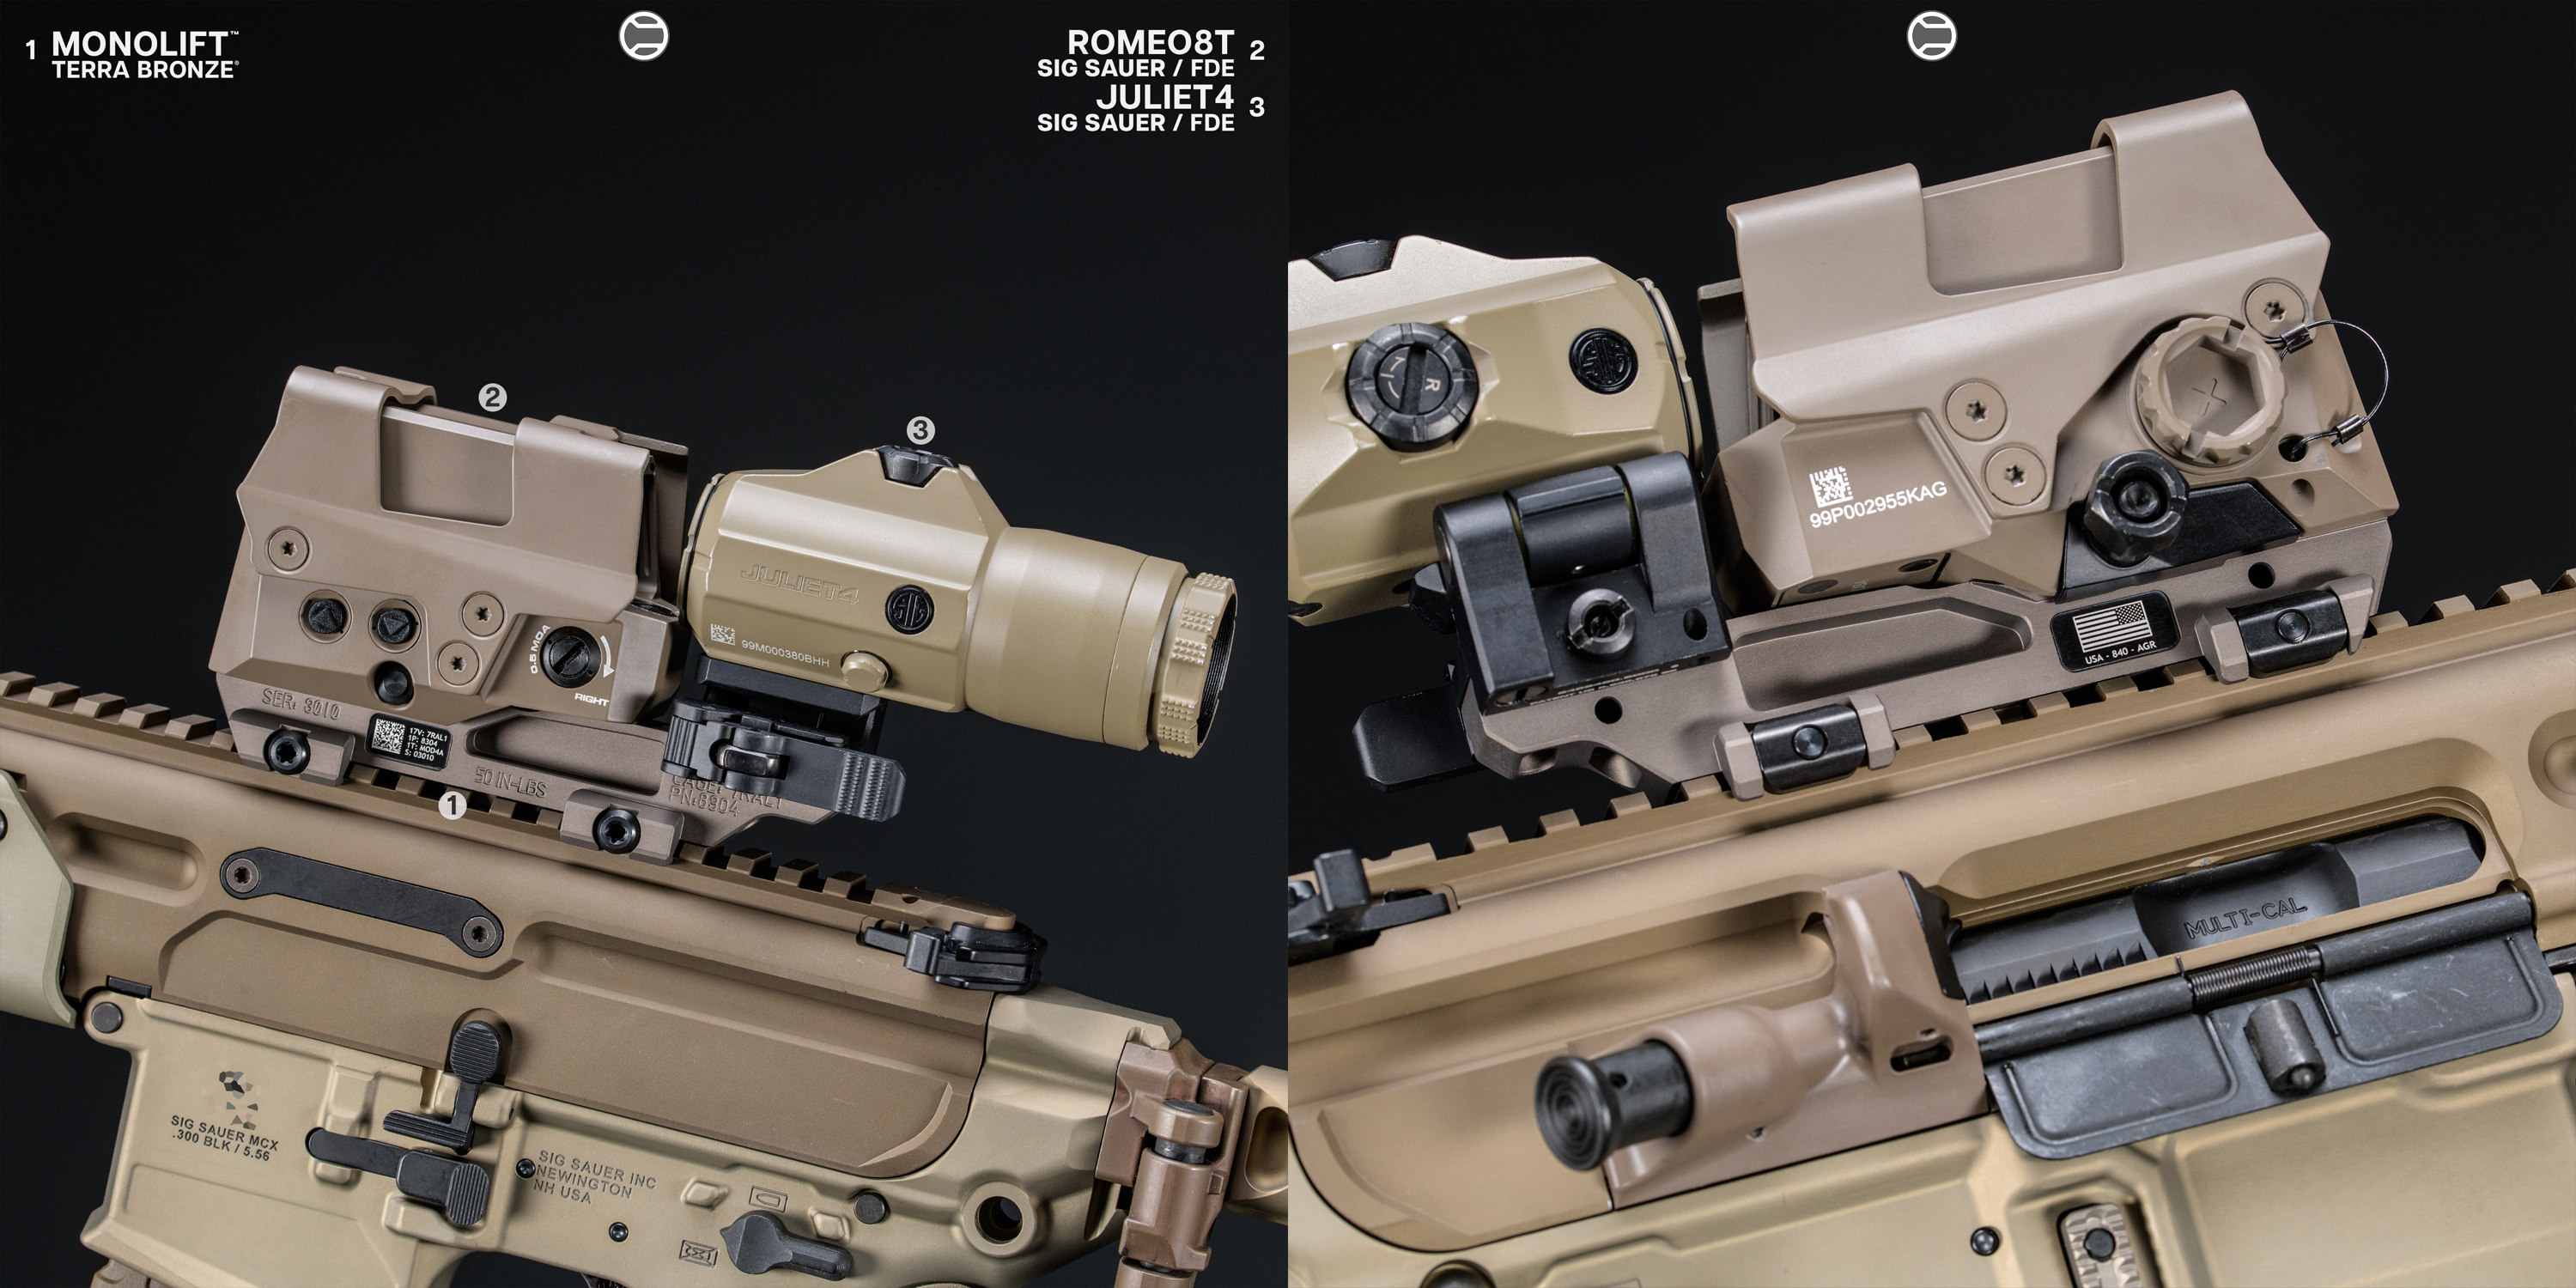
• MonoLift™ Riser - The MonoLift riser was developed at the request of a UK MoD branch with specialized requirements to optimize the contract optics package placement on their newly issued Sig MCX LT variants. The MonoLift riser is also at home on various other platforms with many other optic, magnifier, and even elevated laser combinations when reversed.
6 O’Clock Position – Bottom Rail
The 6 o’clock position is traditionally where vertical foregrips and handstops live. For shooters who run barricade work, C-clamp grips, or competition setups, this rail space can significantly improve weapon handling.
Common Uses:
• Vertical foregrips (VFGs) or angled foregrips (AFGs)
• Bipods for precision shooting
• Barricade stops
• Handstops for consistent grip placement
Why It’s Important:
Your bottom rail is where you’ll mount accessories that stabilize and guide your support hand, improving recoil control and shot-to-shot speed.
RailScales Recommendations:
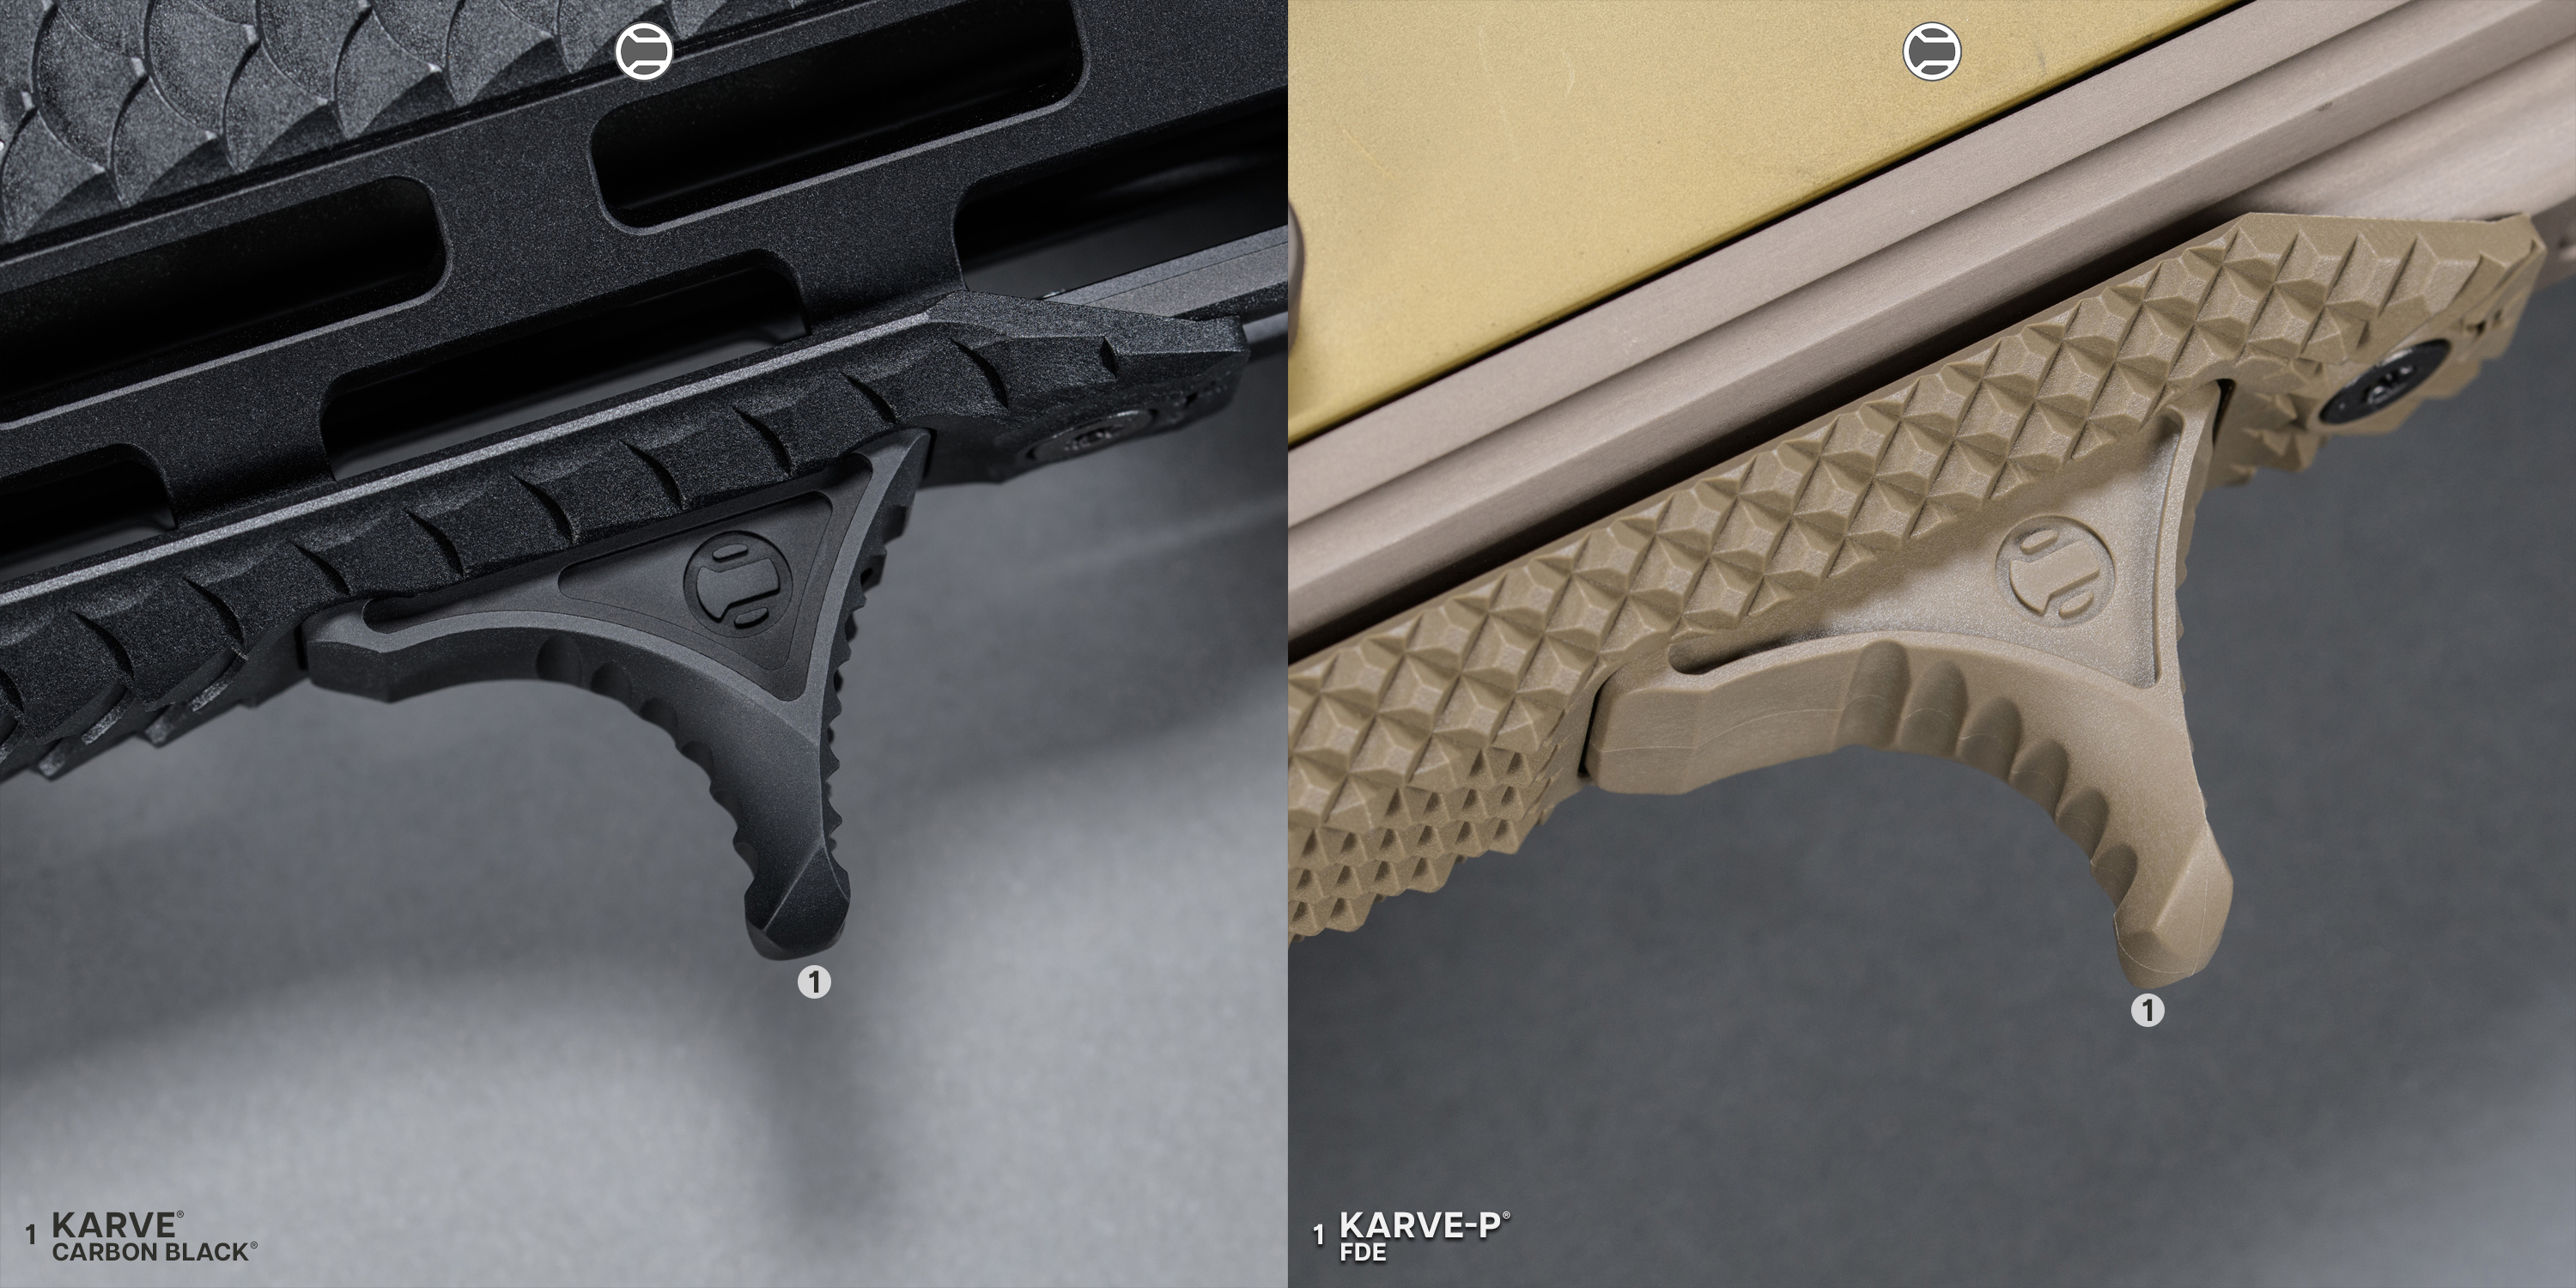
• Karve® & Karve-P® Handstops – Ultra-low profile, lightweight, and ergonomic.
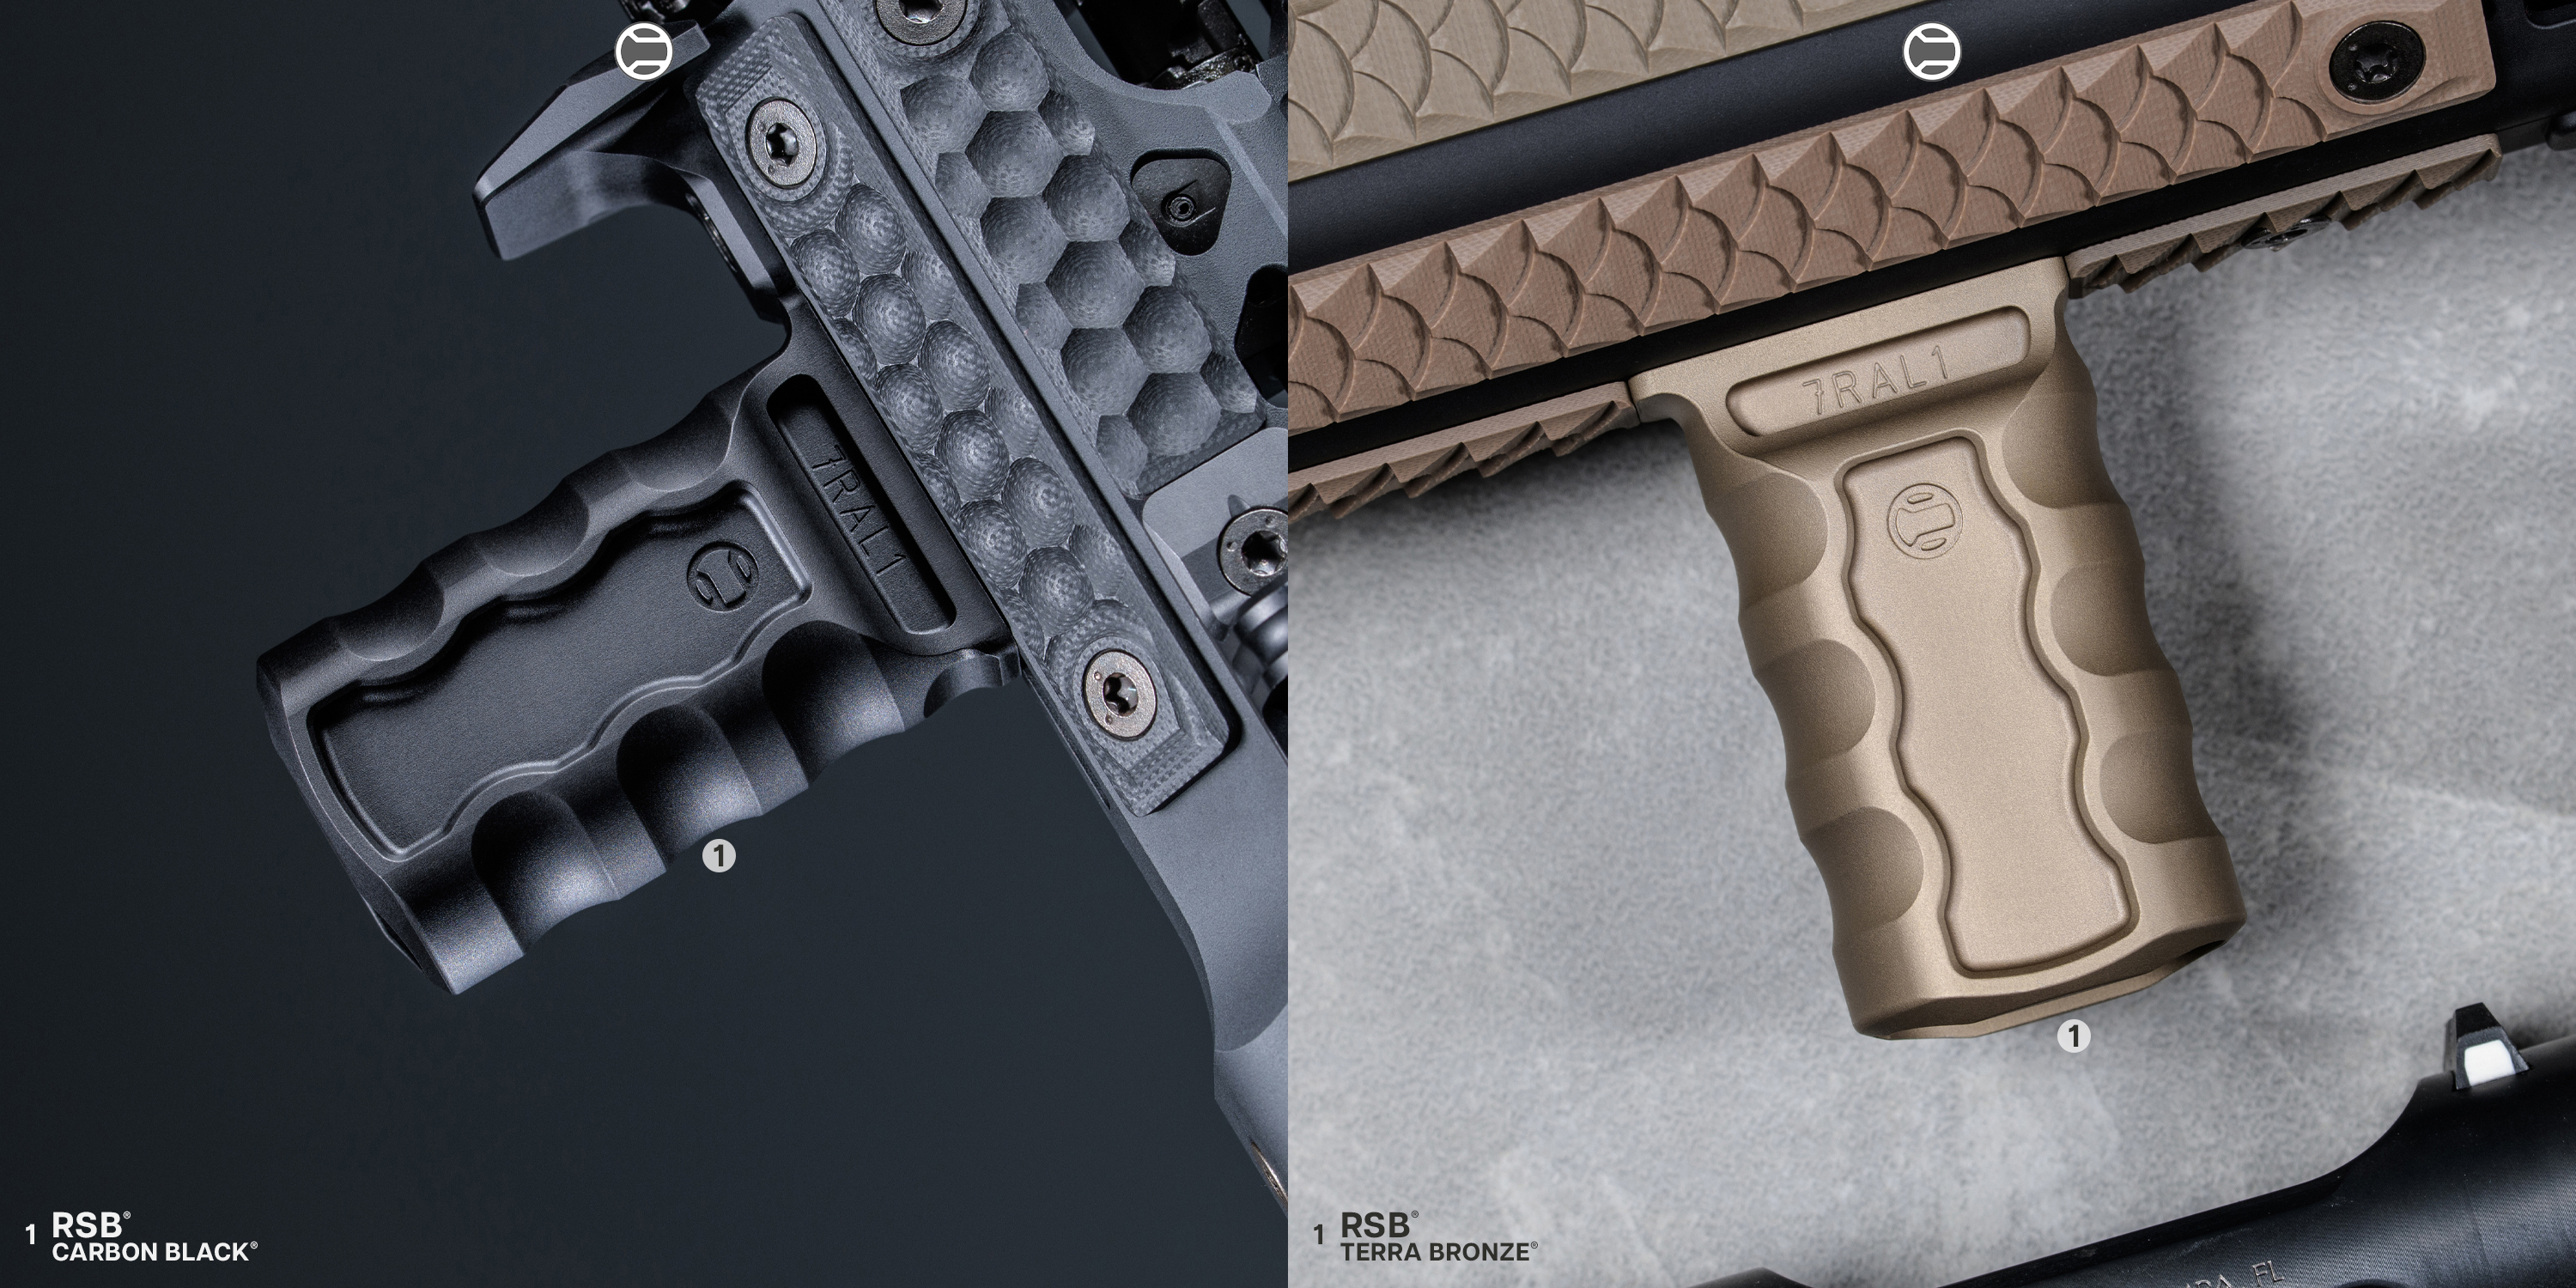
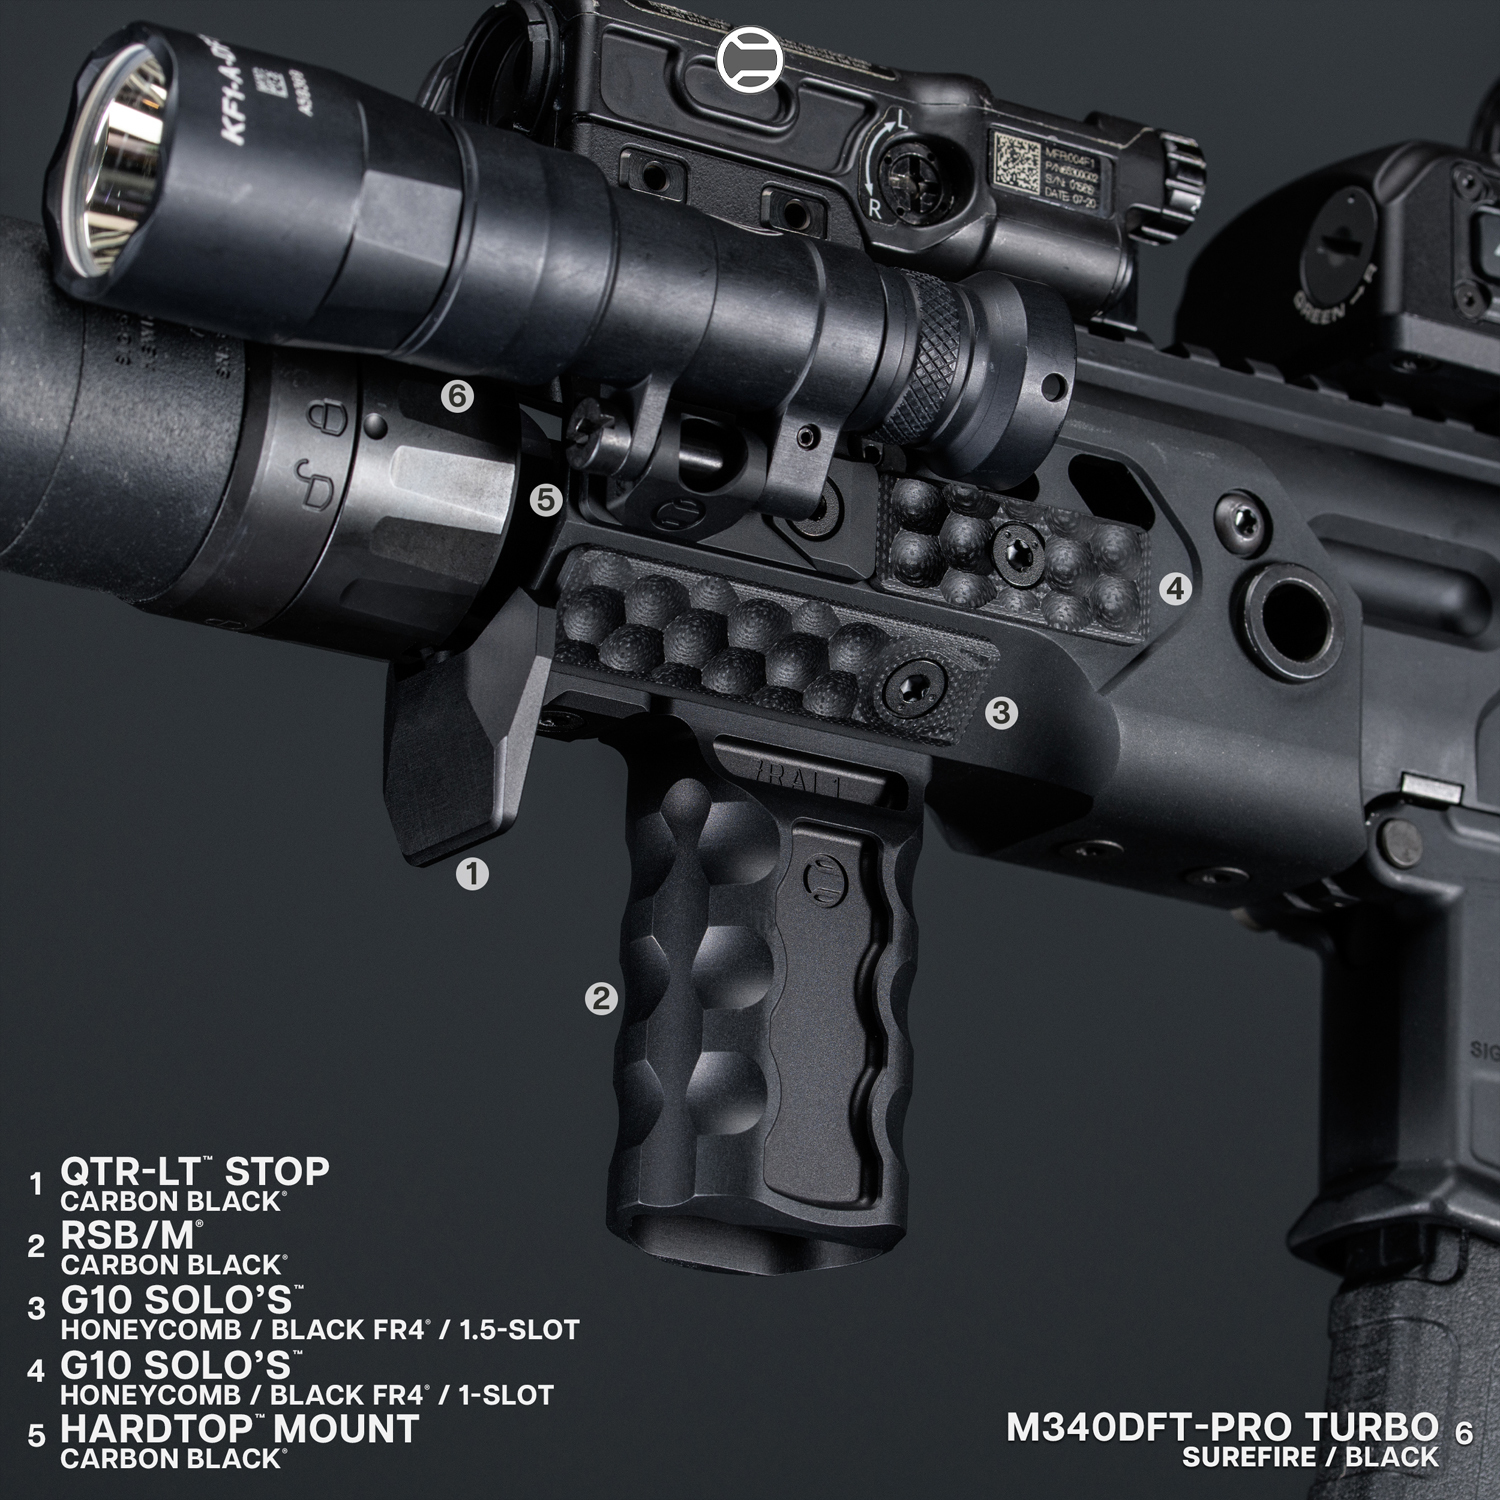
• RSB® Vertical Grip – Compact with a comfortable palm swell, perfect for rapid transitions.
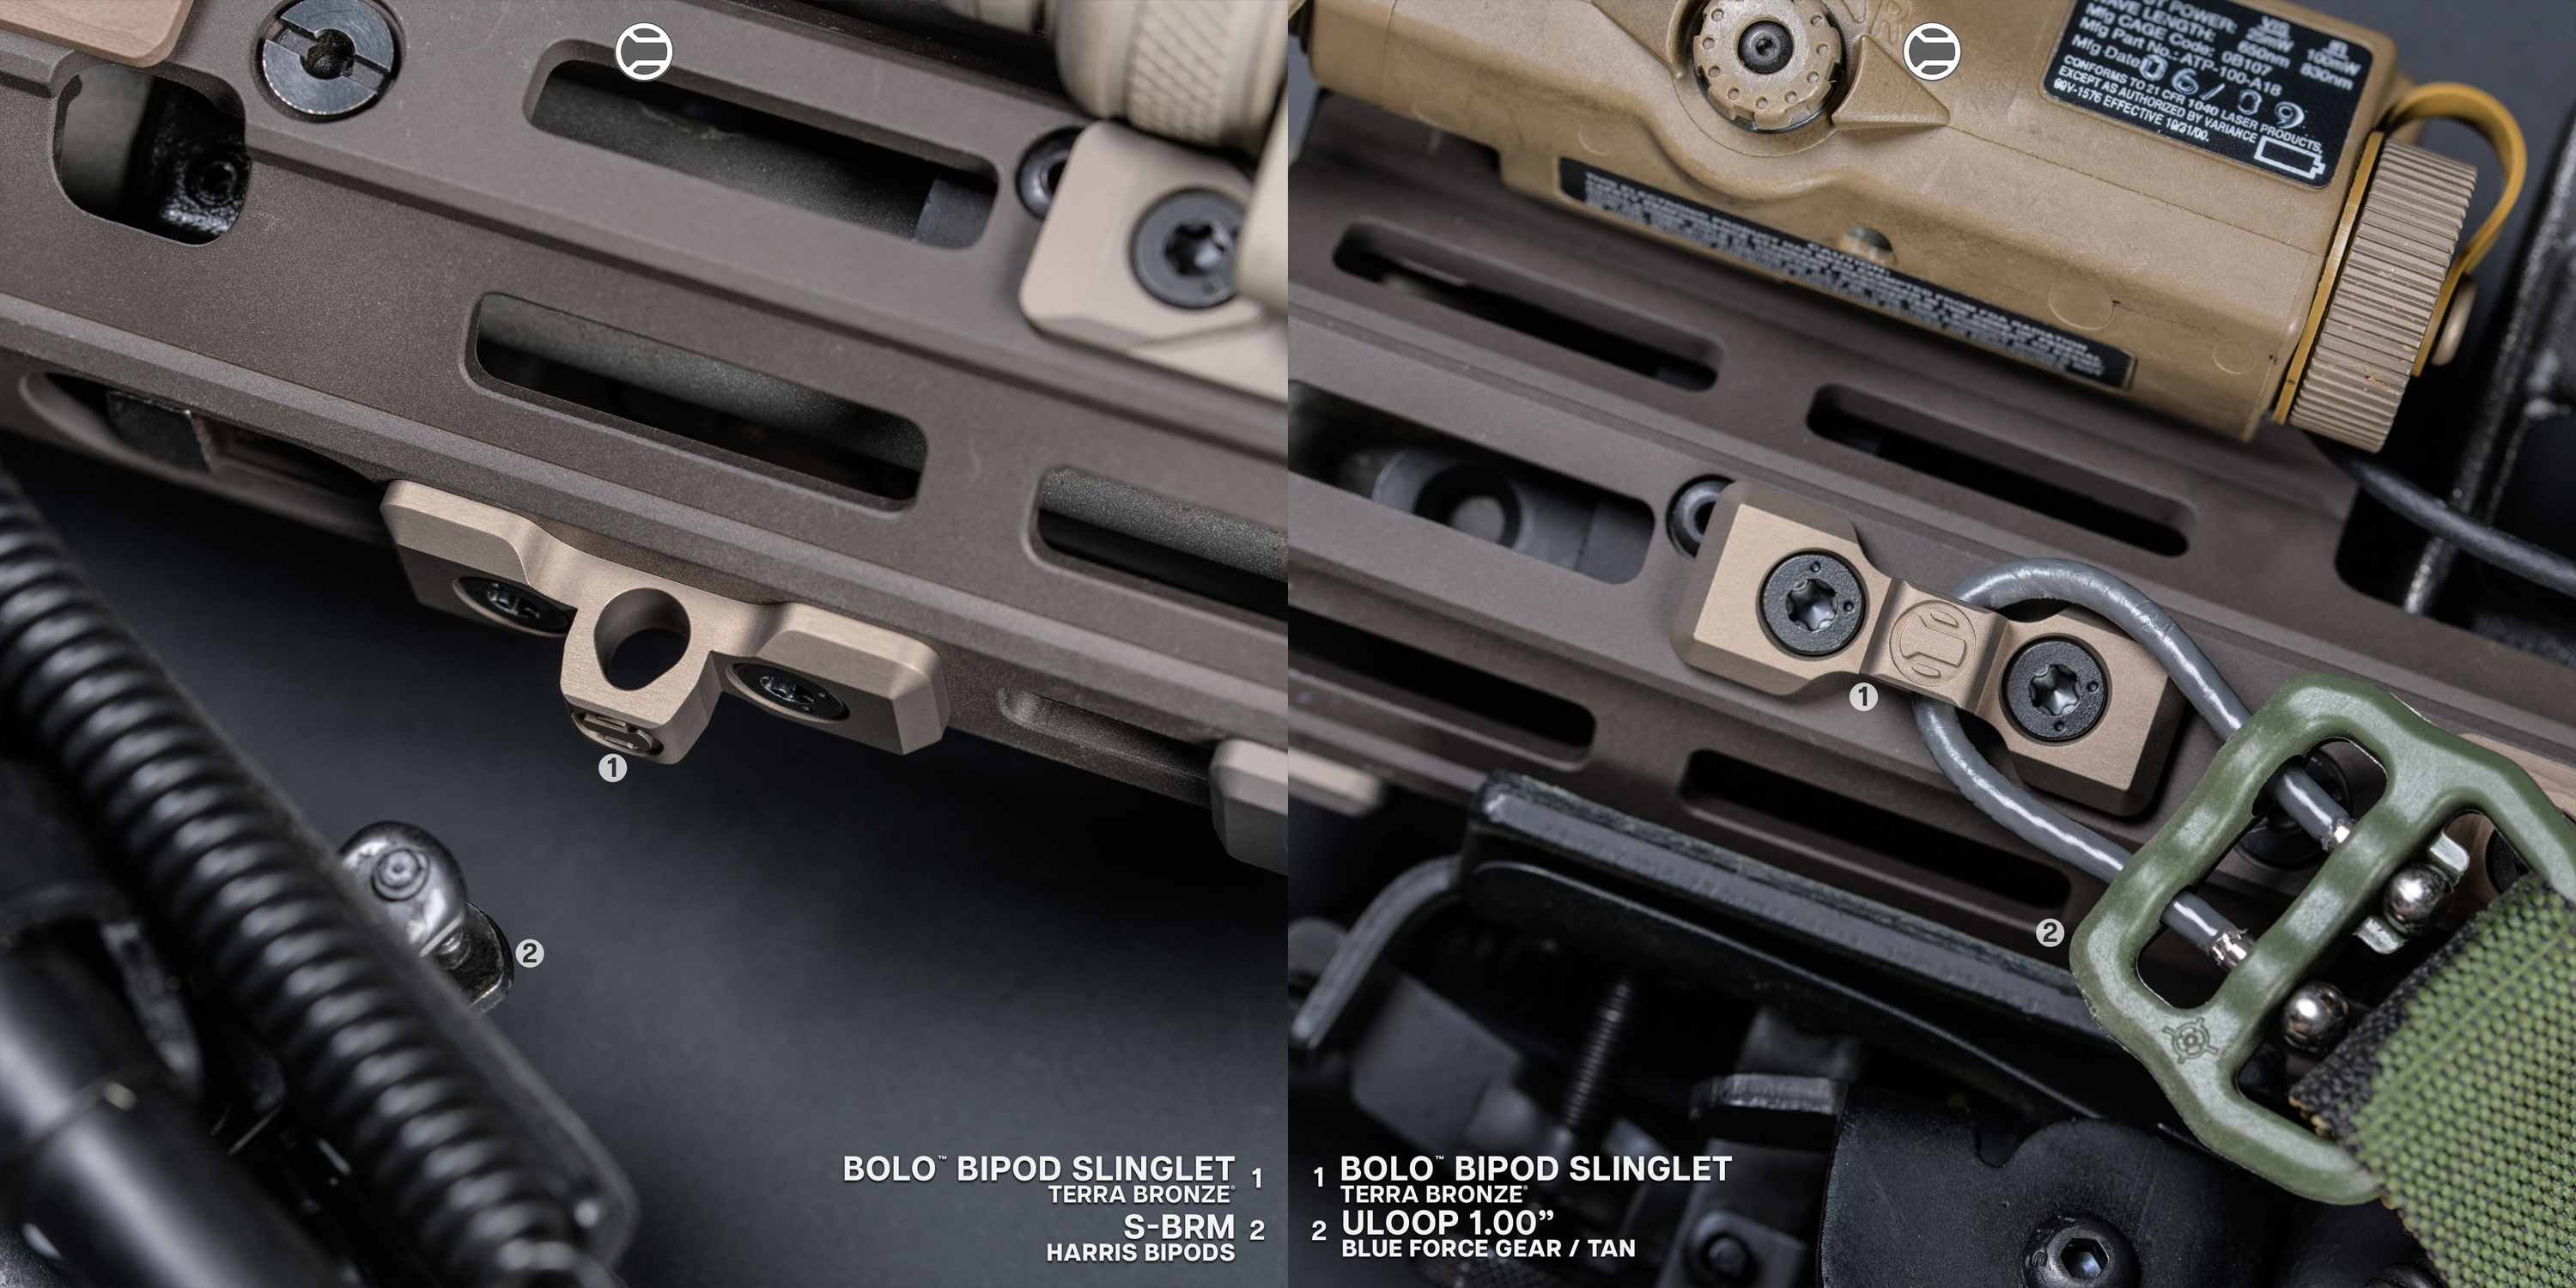
• BOLO™ Bipod Slinglet - Combination ultra low profile bipod and sling eyelit MLOK mount for HK Hooks, U-loops, para loops etc. The unique teardrop through hole shape retains all of the contact footprint of a standard sling swivel for bipod mounting, but also opens up to a 0.250" hole for sling attachments.
3 O’Clock and 9 O’Clock Positions – Side Rails
The side rails (3 o’clock for the right, 9 o’clock for the left) are ideal for accessories that need direct line-of-sight to the target or quick access from your support hand.
Common Uses:
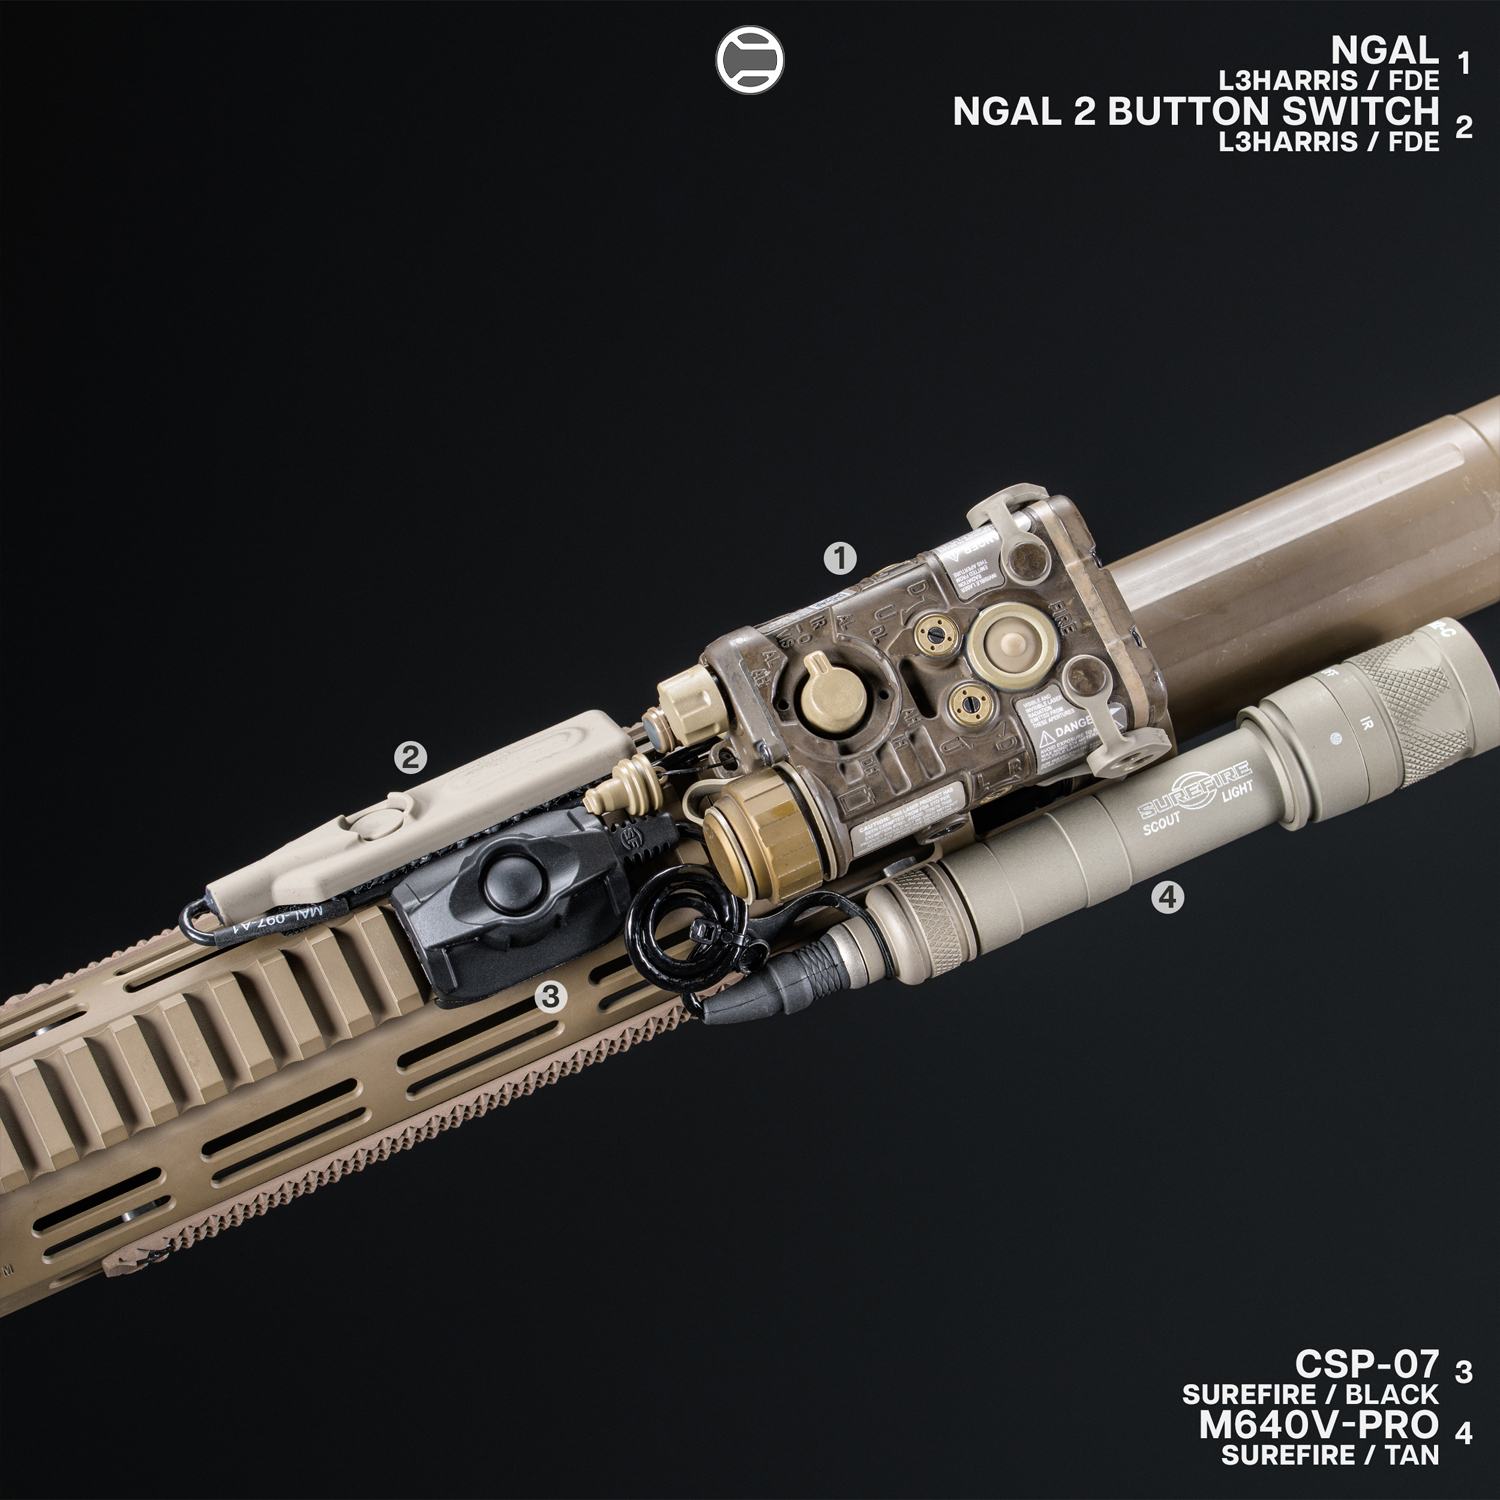
• Weapon-mounted lights
• Offset laser aiming devices
• Sling mounts
• Remote switch mounting for lights/lasers
Why They’re Important:
Side mounting can reduce shadowing for your light, provide ergonomic activation for your support hand, and keep the rifle’s profile slim.
RailScales Recommendations:
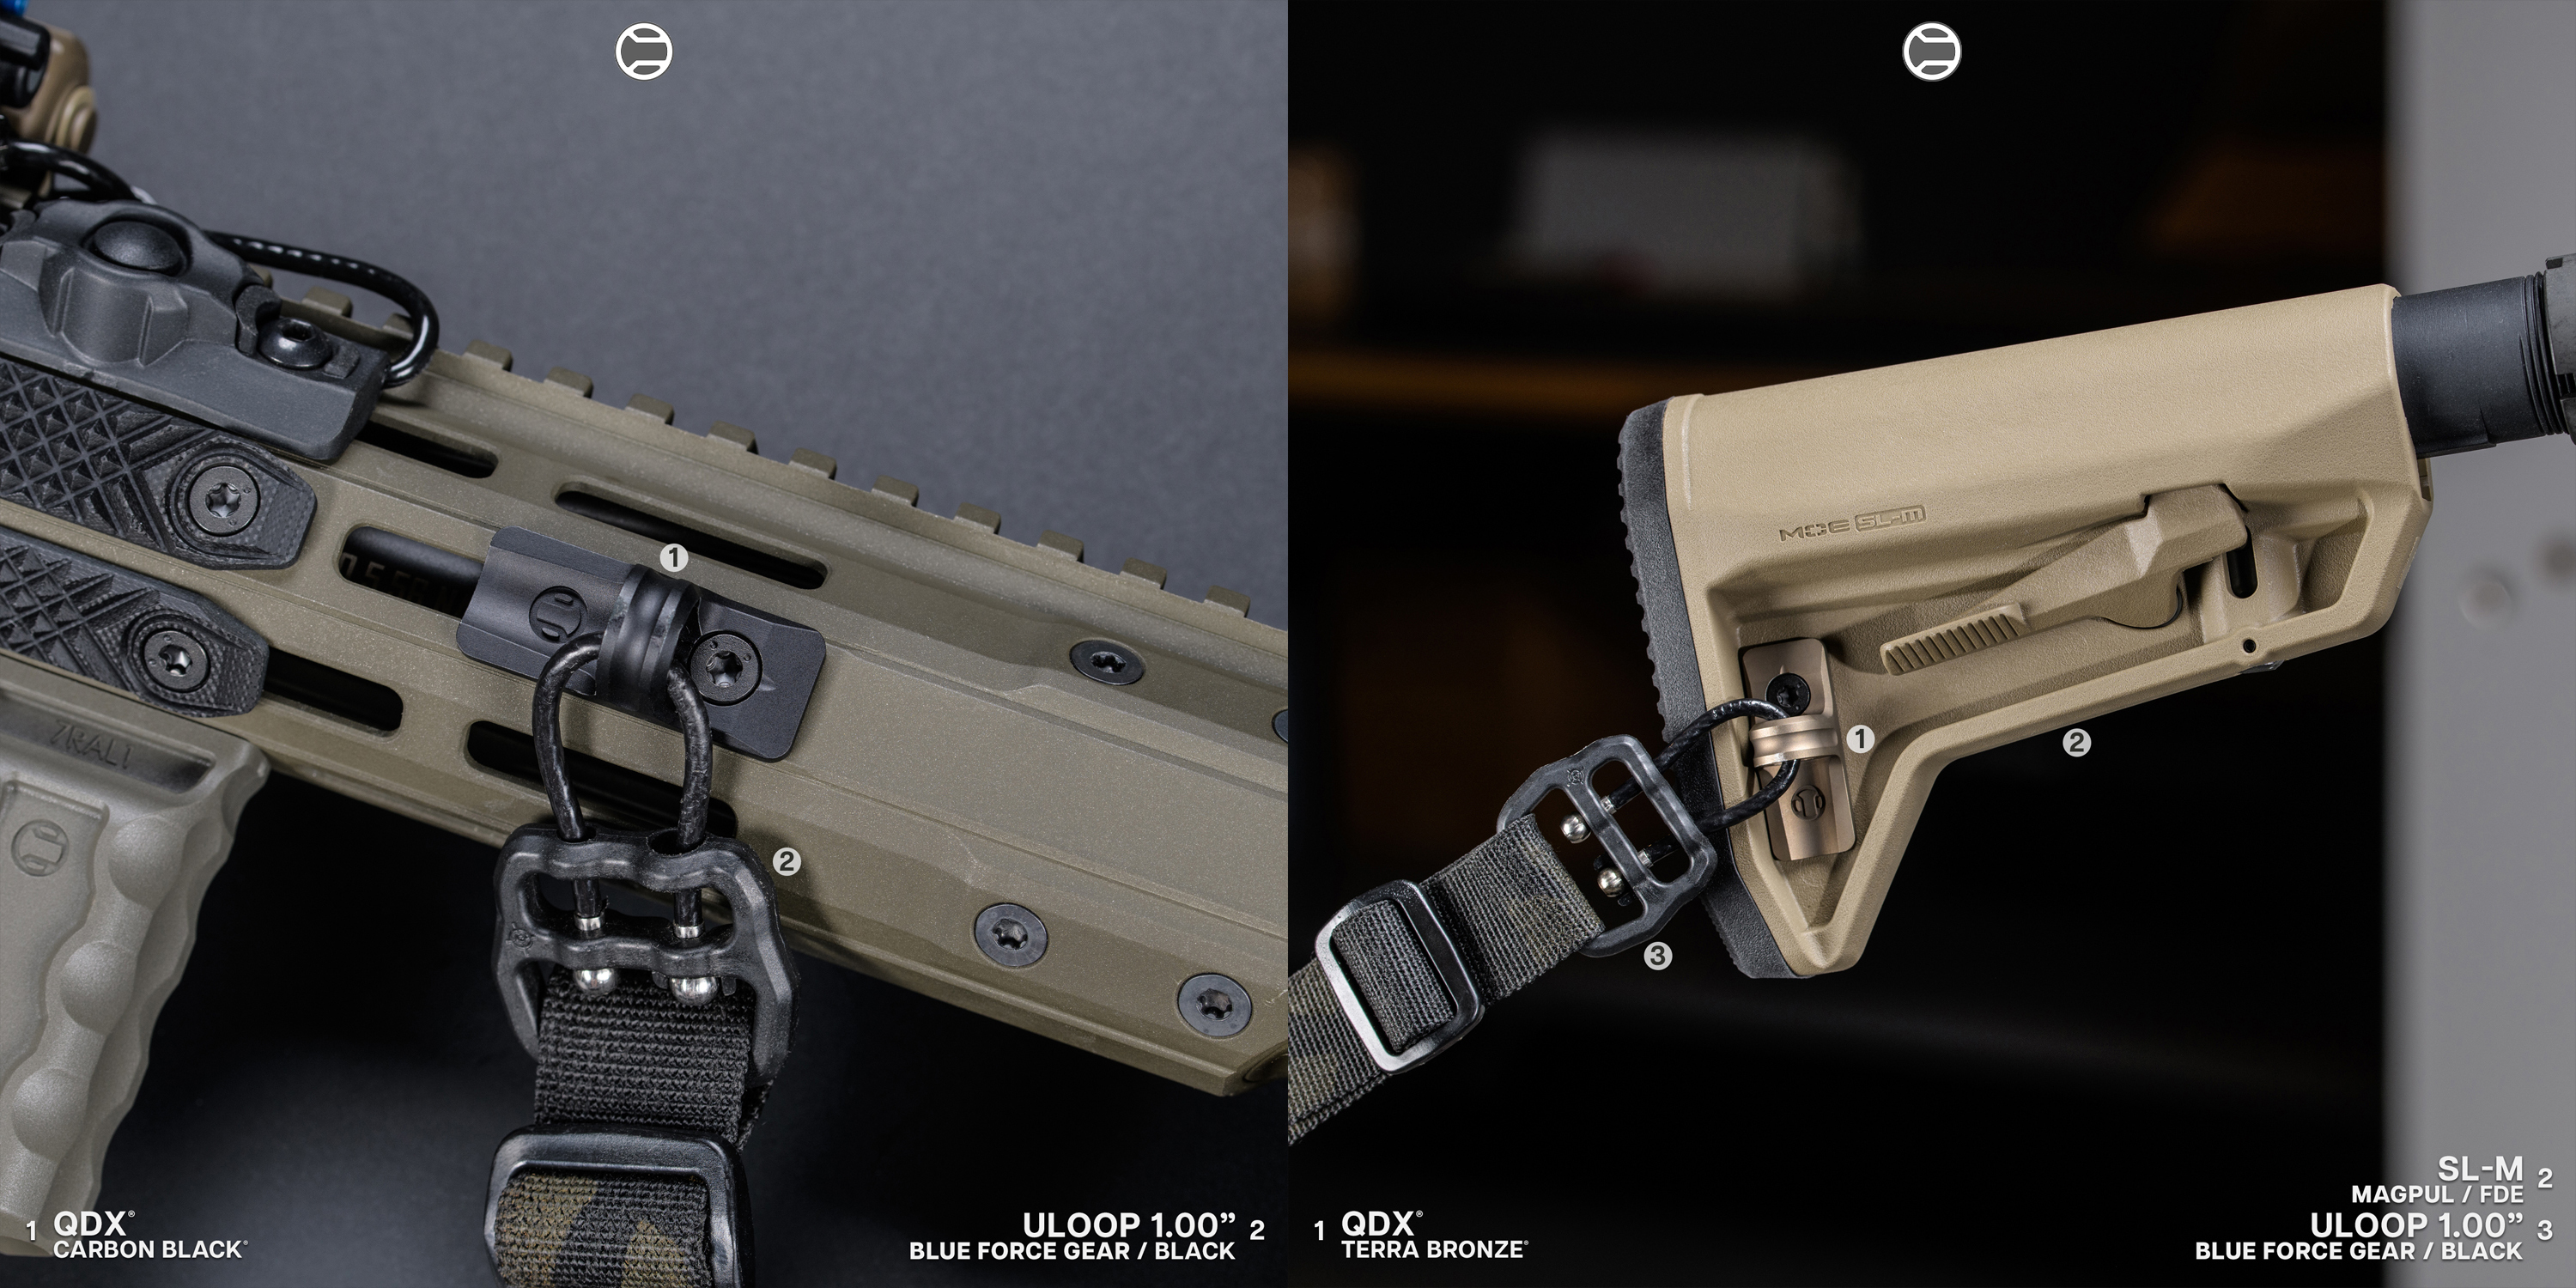
• QDX® M-LOK Sling Mount – Low-profile sling attachment point.
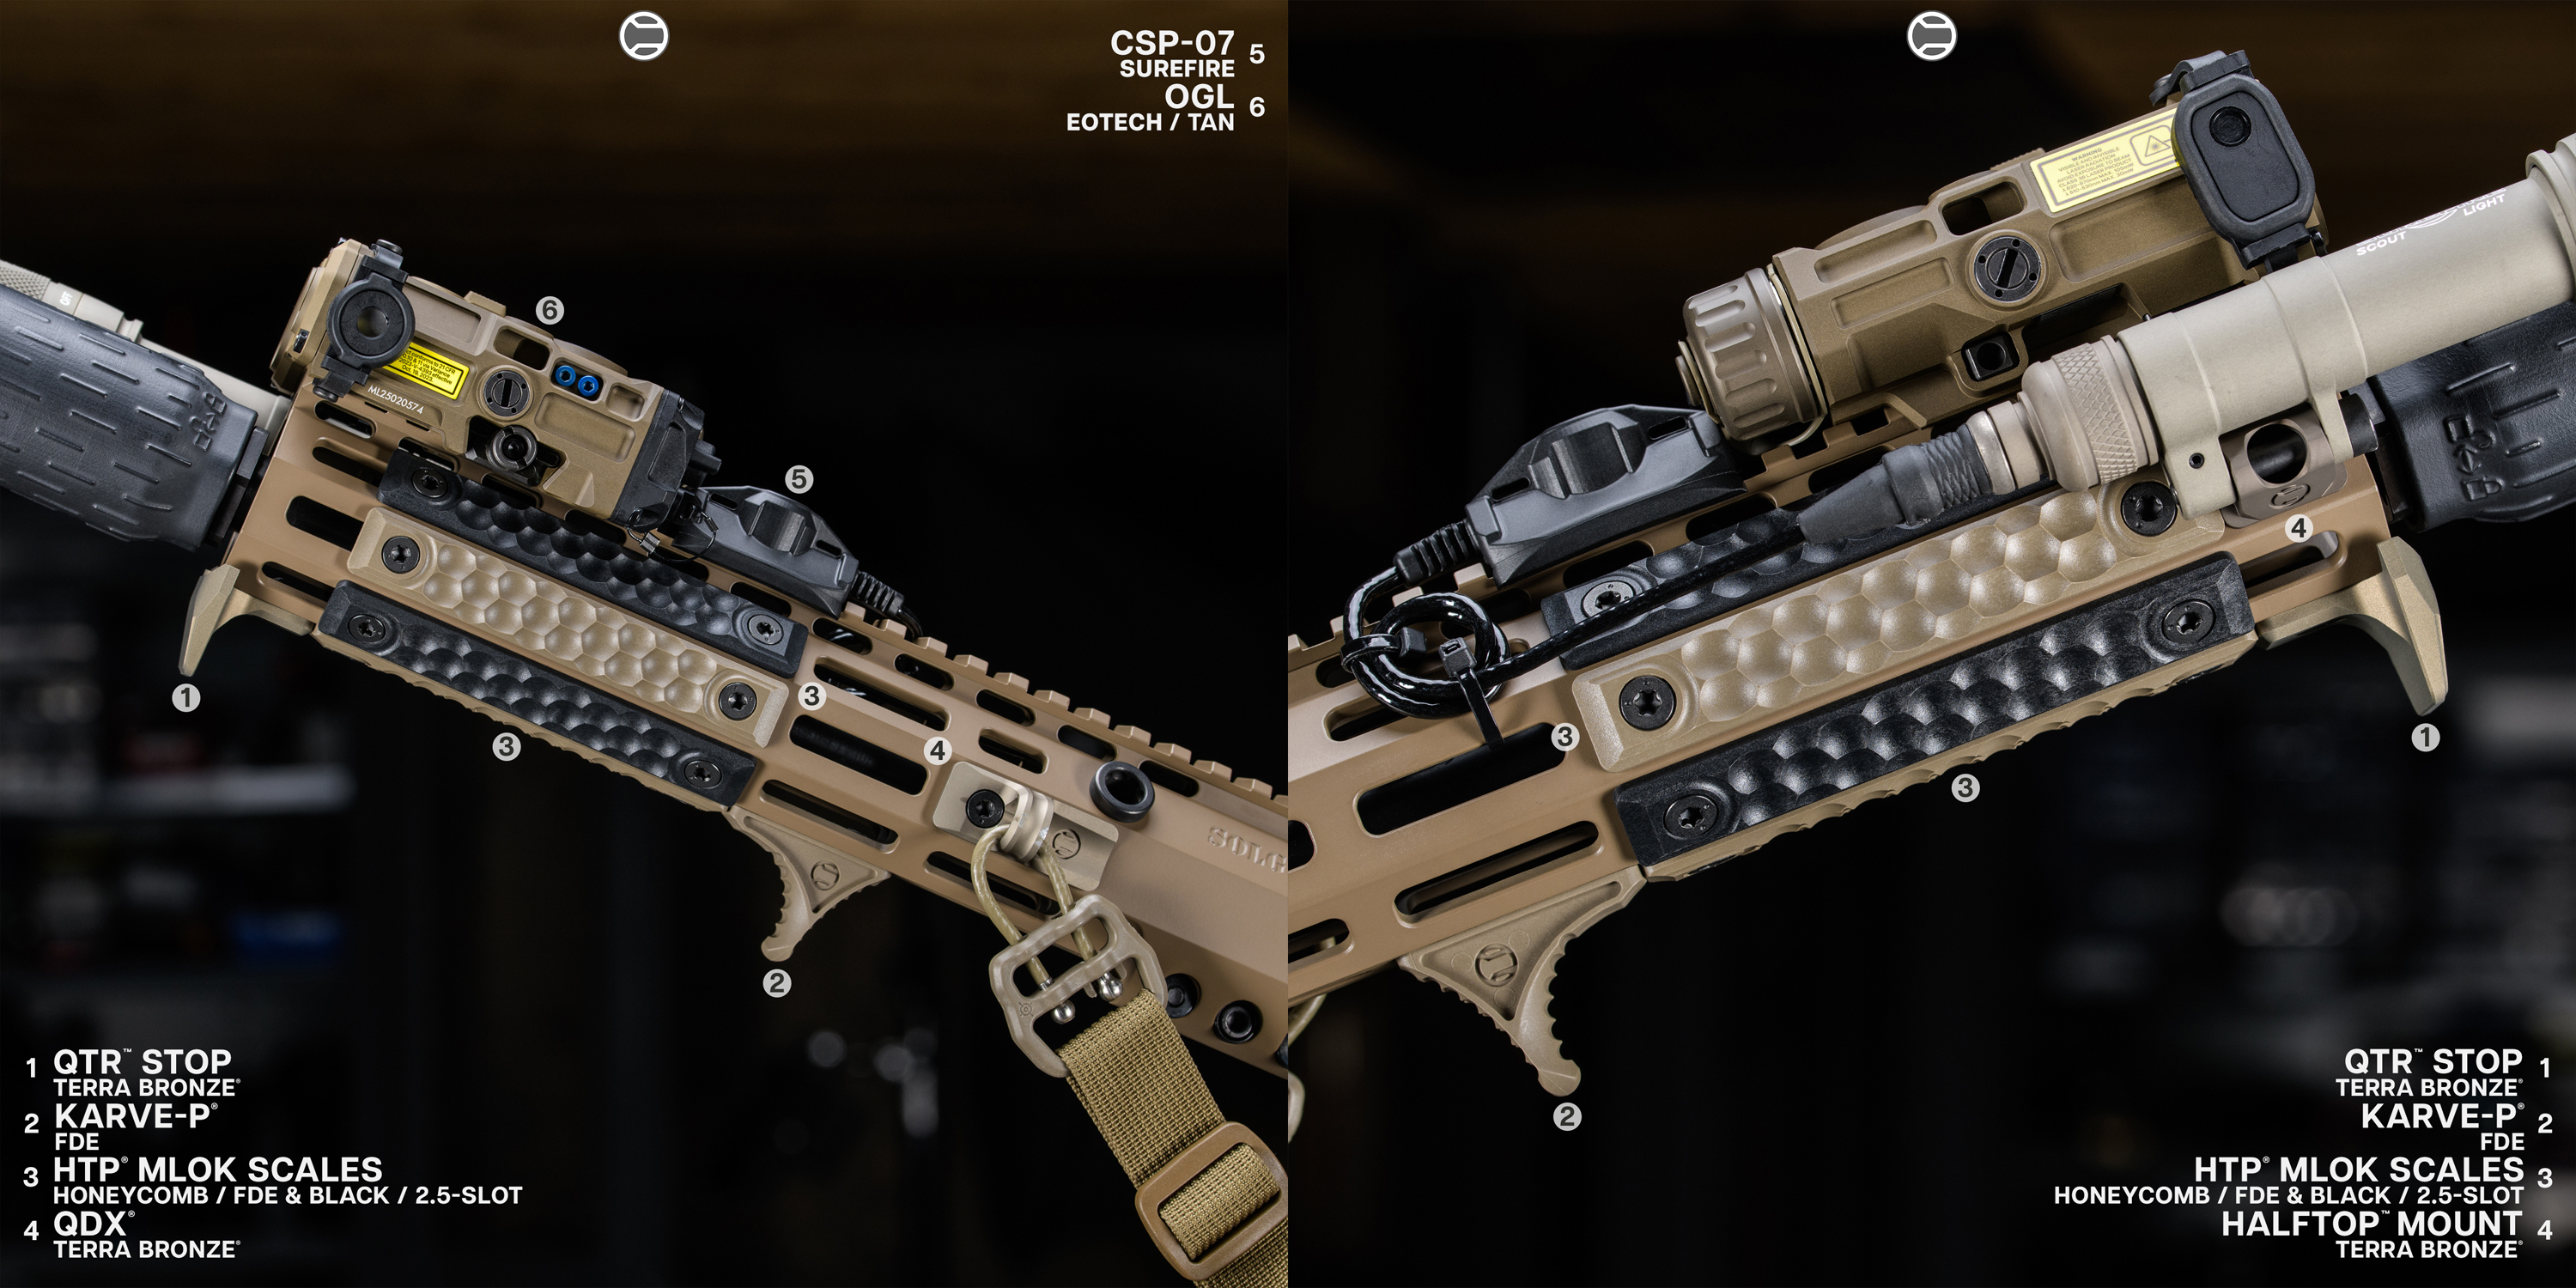
• HTP® Scales for insulating hands from heat on exposed side rails.
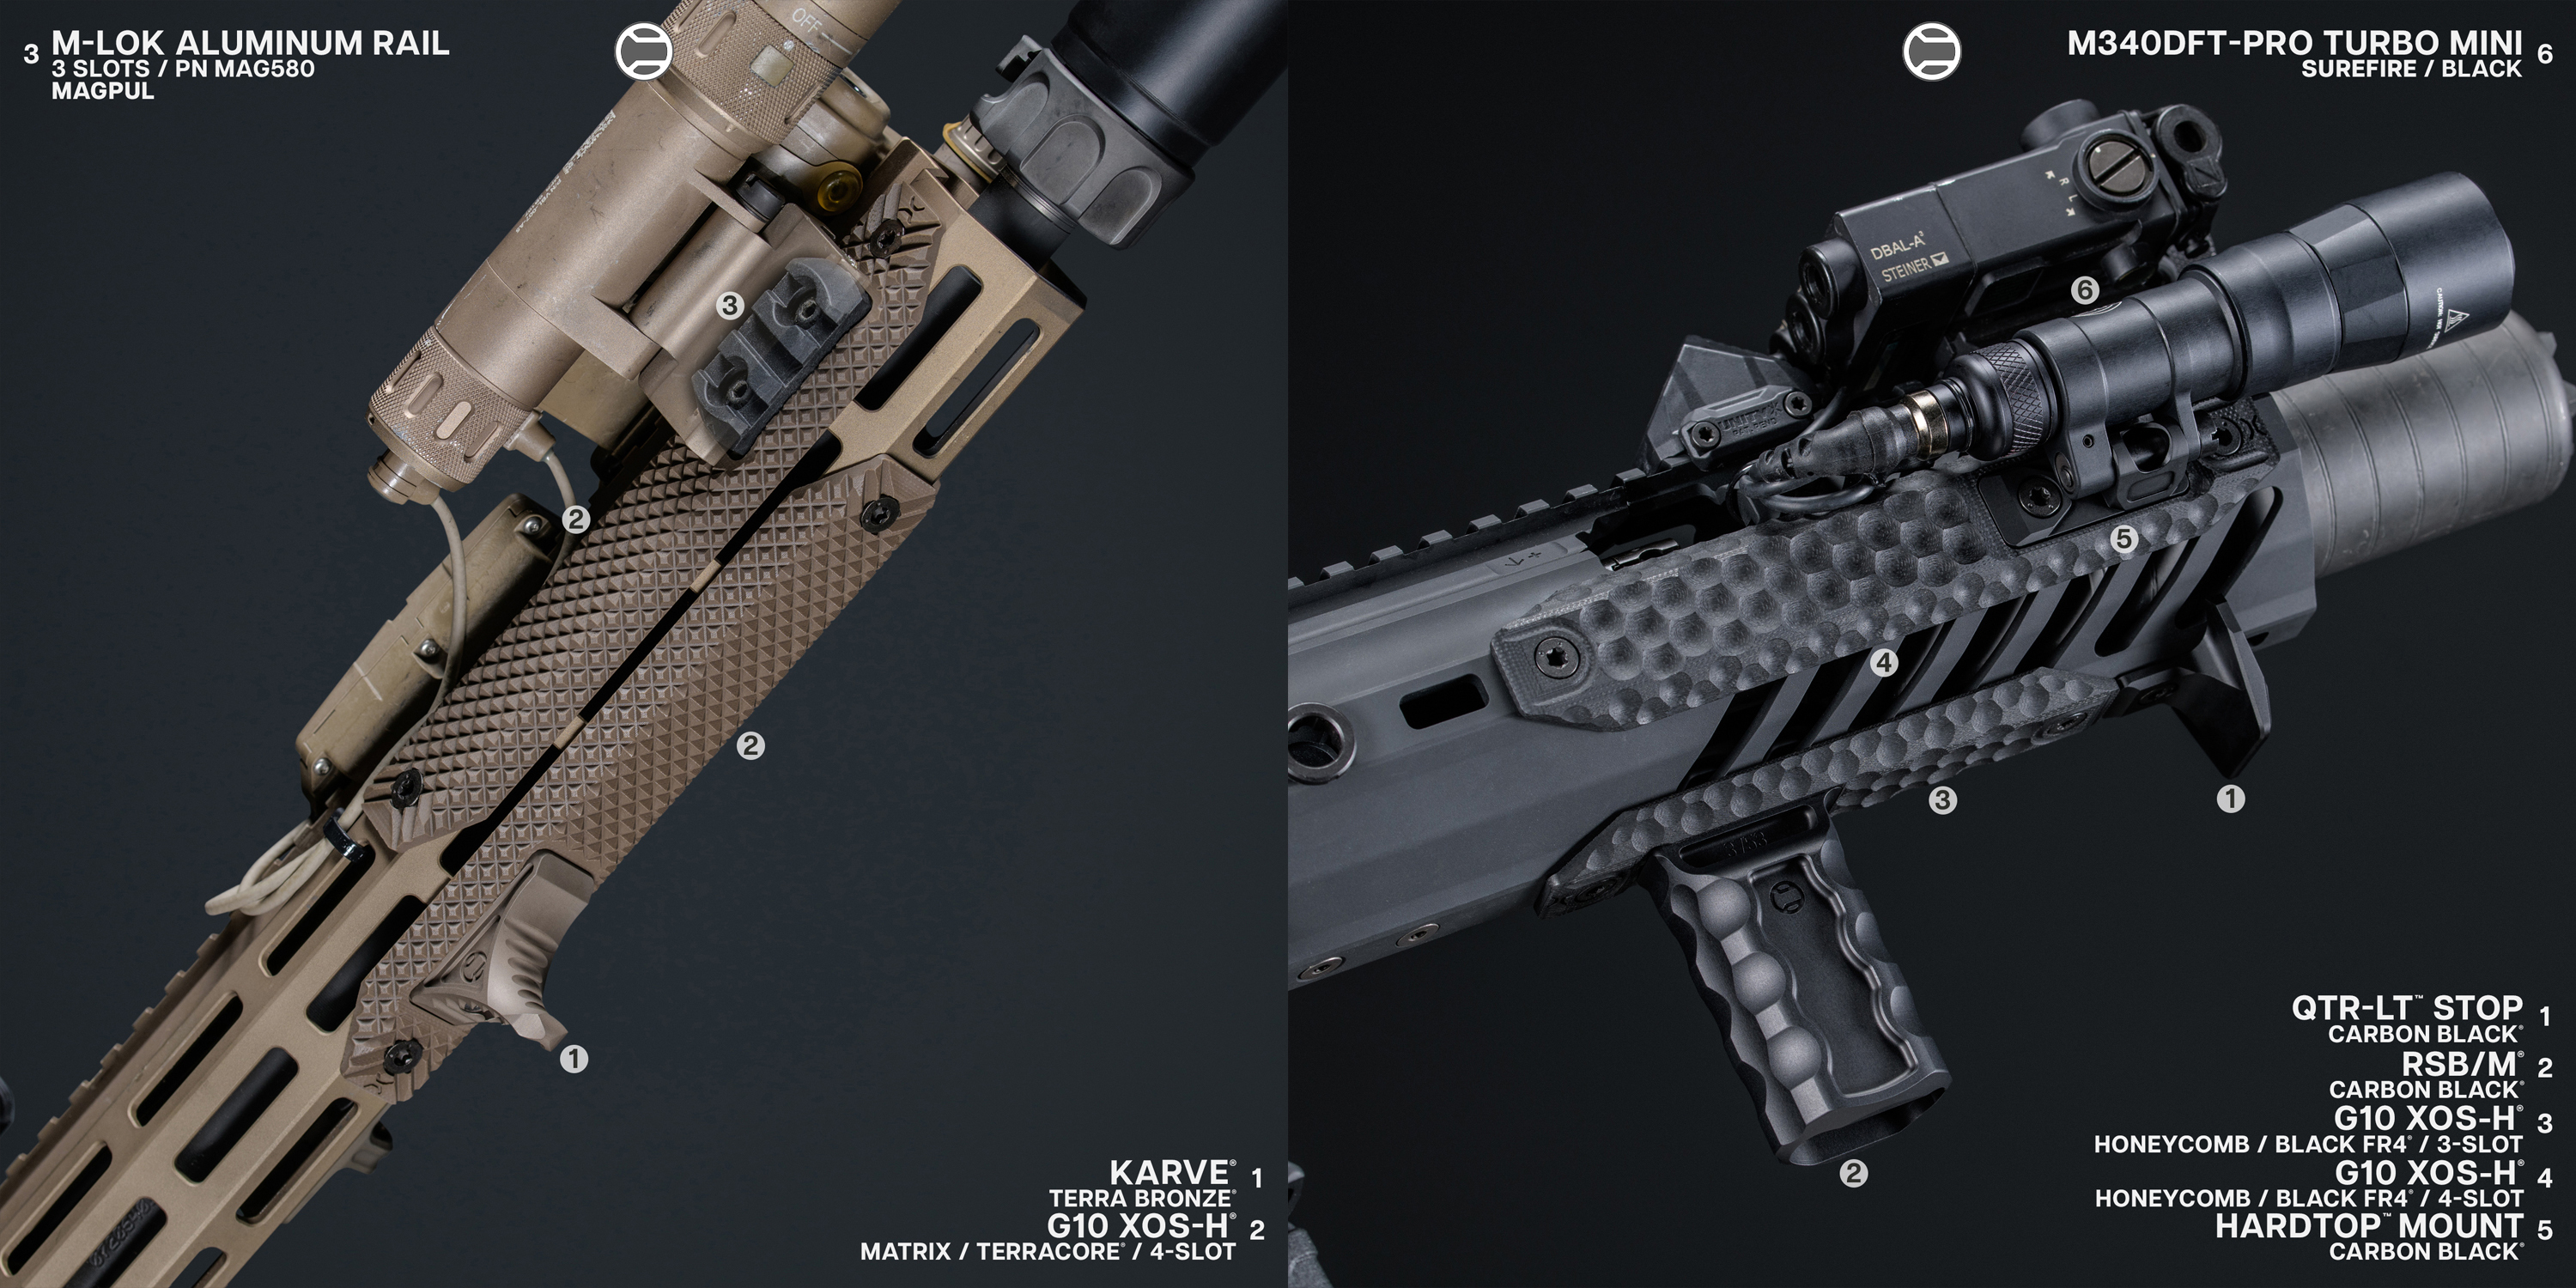
• XOS-H® Rail Covers – Extended coverage with accessory cutouts for seamless light/laser integration.
45-Degree Rail Positions
The 45-degree angle positions between the main clock points are perfect for offset optics and accessories. They allow for lightning-fast transitions without changing cheek weld or stance.
Common Uses:
• Offset red dot sights for dual-optic setups
• Backup irons at an angle
• Secondary lights for CQB or unusual shooting positions
Why They’re Important:
These positions maximize versatility, especially for competition shooters or those who run both magnified optics and close-quarters solutions.
RailScales Recommendations:
• Pair RailScales® G10 Solo Panels with offset mounts to protect unused rail while maintaining a clean grip surface.
• Scout Pro Hardtop™ Mount - Patent Pending 1 M-LOK slot base for SureFire Pro rotating light bodies. The Hardtop mount is reversible, offering 0.788" of fore / aft adjustment within its own 1 Slot mounting footprint (see pics).
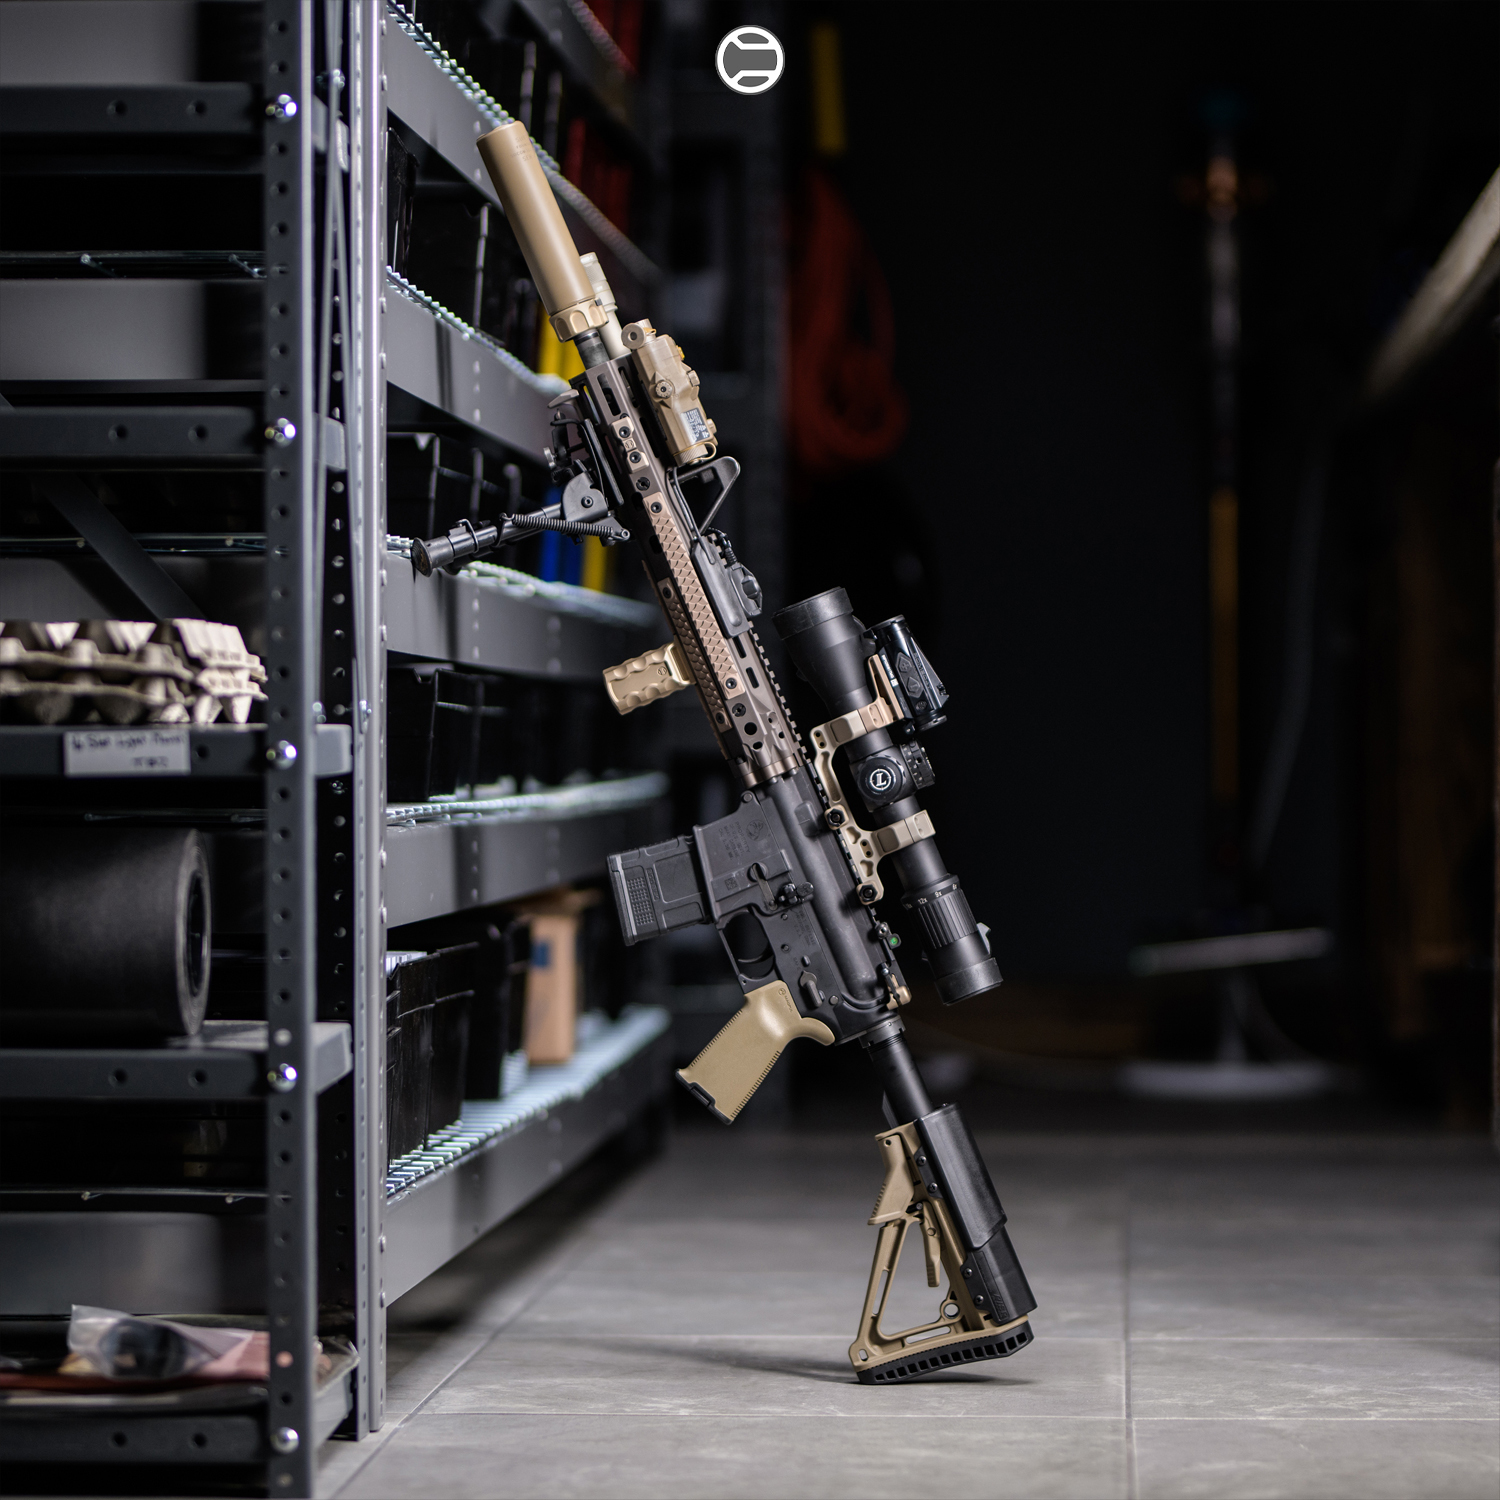
Combining Rail Positions for Maximum Effectiveness
Smart shooters don’t limit themselves to one or two positions. Combining accessories across multiple rail faces can create a truly mission-specific rifle.
Example setups:
• Duty/Defense – Red dot + magnifier at 12, light at 3, Karve® at 6, sling point at 9.
• Competition – LPVO at 12, offset RDS at 45, light at 3, handstop at 6.
• Precision – Scope at 12, bipod at 6, laser rangefinder or illuminator at 3.
FAQ: AR Rail Positions
Q: How do I know which rail position is best for me?
A: Base it on your shooting style, dominant hand, and intended rifle role (defense, competition, precision, etc.).
Q: Does rail type (Picatinny, M-LOK, KeyMod) change accessory placement?
A: The mounting method changes, but the clock-face position references remain the same.
Q: Can I run both a handstop and vertical grip?
A: Yes—many shooters combine them for versatility, especially in different shooting stances.
Q: Are 45-degree positions worth it for a civilian rifle?
A: Absolutely, if you run dual optics or want faster transitions for close-range shooting.
Q: Do RailScales products fit all rail systems?
A: RailScales offers products for both M-LOK and KeyMod, as well as picatinny mounted options like the LDAG® and MonoLift Riser®

Final Thoughts On the Most Common Rail Positions
Understanding your AR’s rail positions and using them intentionally can dramatically improve your rifle’s ergonomics and mission-readiness. Whether you’re a duty-bound professional, a 3-gun competitor, or a range-day enthusiast, thoughtful accessory placement is as important as the best AR accessories themselves.
With RailScales products—proudly American-made—you can outfit every rail position with precision-engineered gear that won’t fail when it matters most.
Disclaimer:
This blog content was generated by a human and with the aid of artificial intelligence. It may contain errors or inaccuracies and should not be relied upon as a substitute for professional advice. This content is for SEO/entertainment purposes only and the views expressed in this content does not necessarily reflect the views of RailScales LLC. For more information, please refer to bullet point #13 on our FAQ.